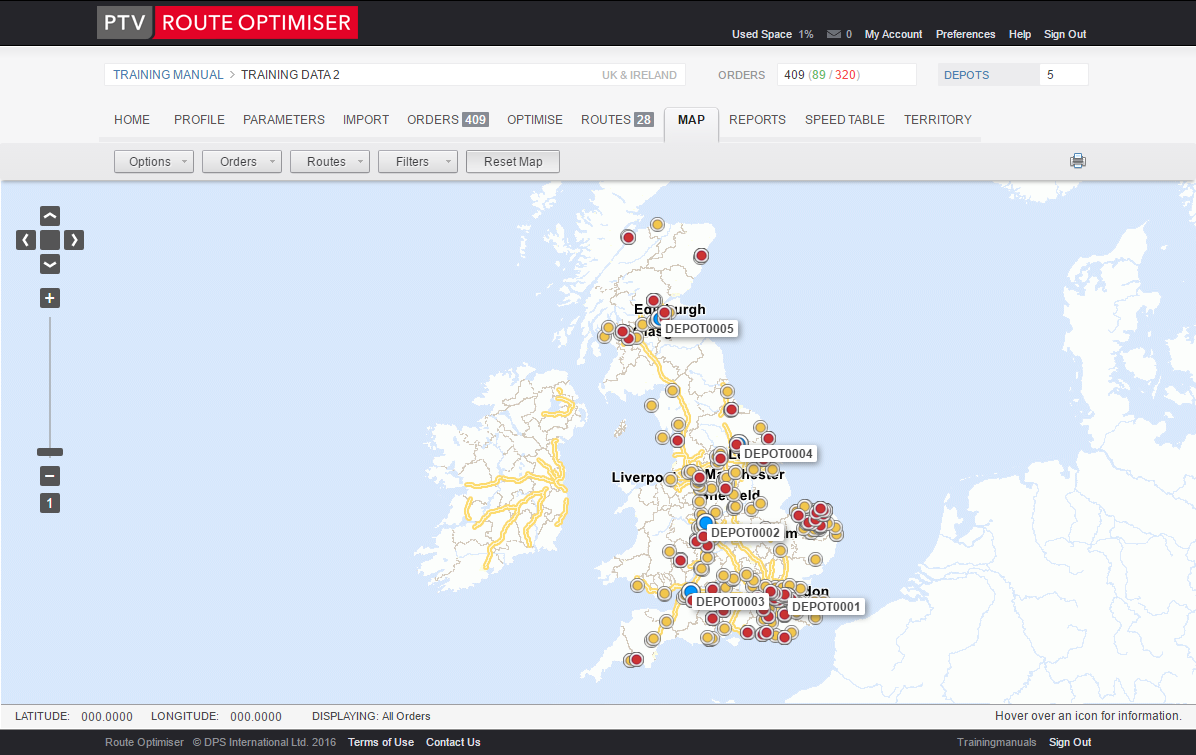
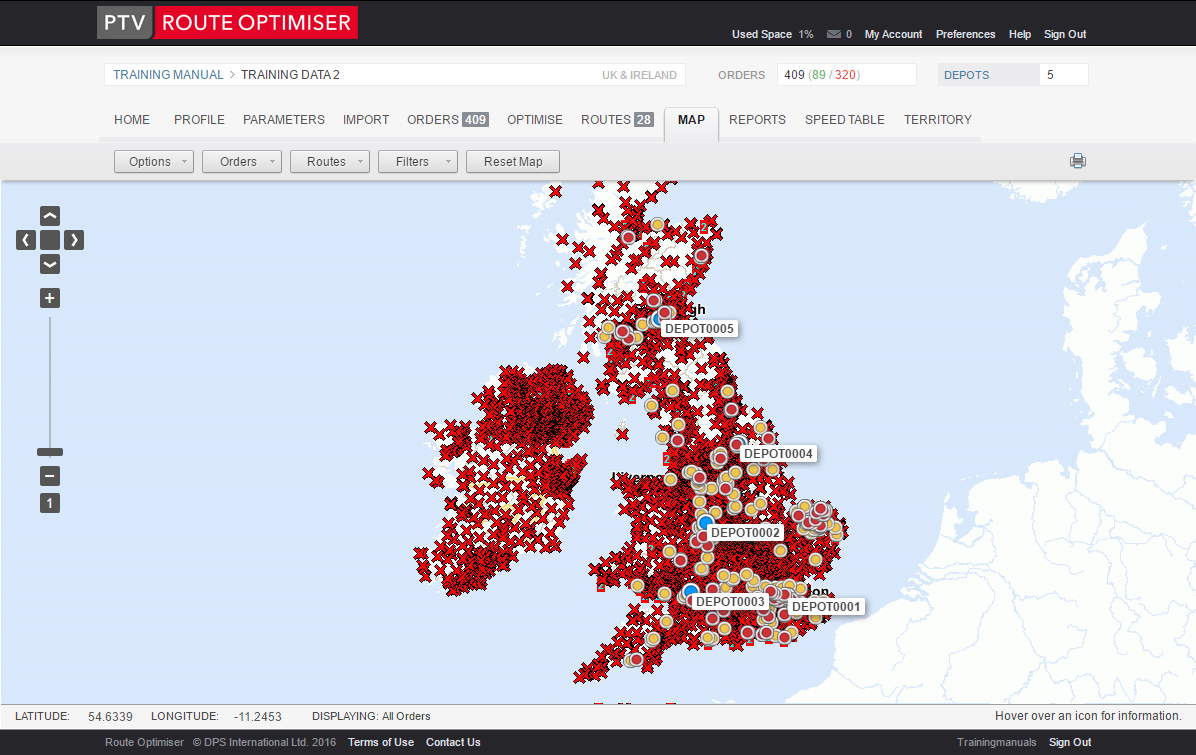
The Map tab allows you to view your orders and your routes.
The initial view of the map will differ depending on the 'Default' filter that you have set within your My Account - Preferences area
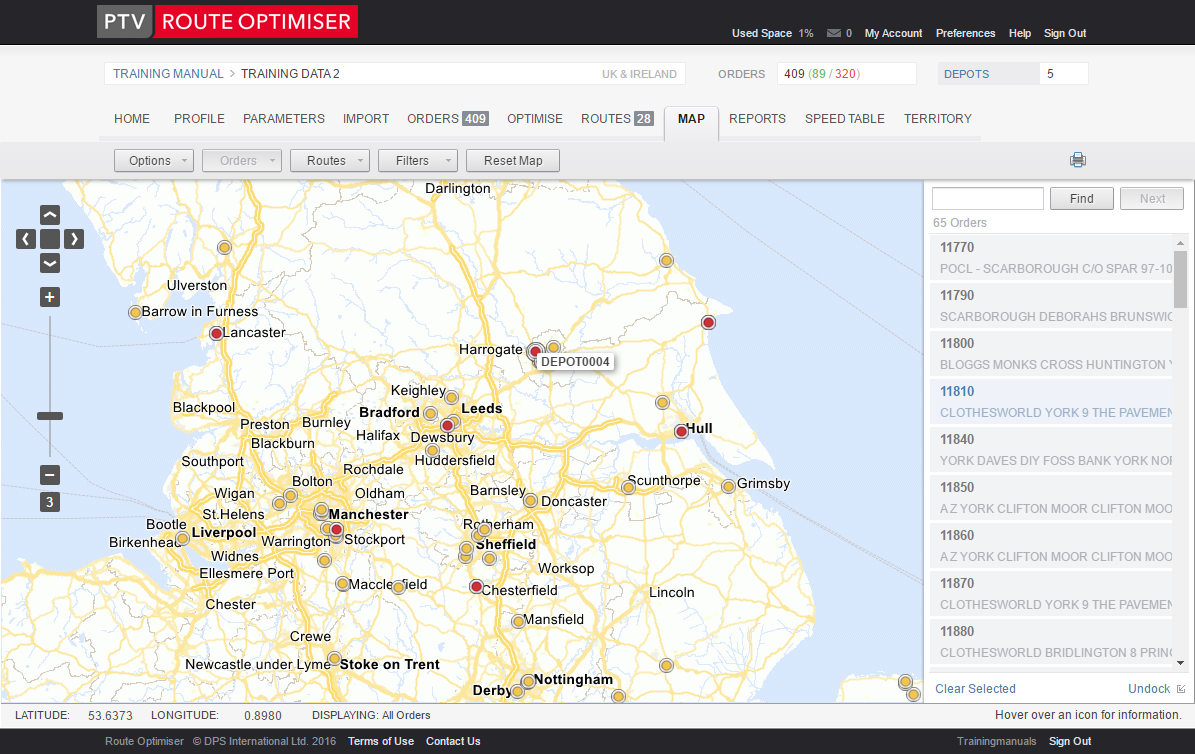
With orders imported icons display on the map marking the location of the order. Yellow icons represent single orders while red icons indicate multiple orders at the same location. As the text in the bottom right corner suggests, hovering over an icon will cause a window to appear displaying details of the order.
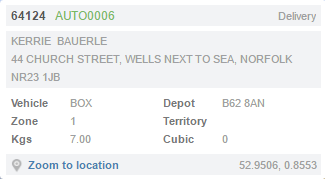
This dialog box will give basic information about the order that you are looking at. There is also a link 'Zoom to location' which will zoom the map close into the order.
Hovering over an icon that is red (multiple orders at one point) will cause a small popup to appear. This will show you the Order number of the first in the list (and in this case the route that it is on). You should also note the '+1 more' link that will enable you to expand the view to see all of the orders at this particular point.
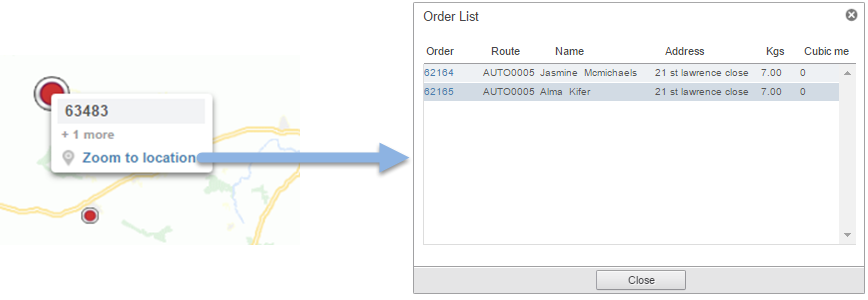
You can open the 'Order Details' window by clicking on the specific Order reference or double-clicking somewhere on the line of the order.
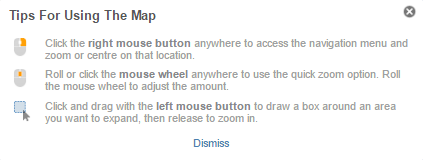
To zoom into an area on the map click and drag the mouse over the area that you would like to zoom into. You can do this several times if you like.
This allows you to pan the map north, south, east and west by clicking on the corresponding directional arrow:
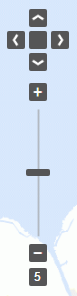
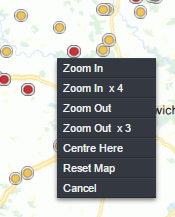
A quicker method perhaps is to use the right + click options on the mouse and select the option that suits you from the list.
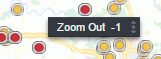
or, if it is a simple 'Zoom in' or 'Zoom out' that you want you can use the mouse wheel to scroll through a number of options.
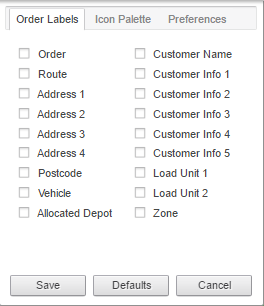
There are many 'Options' that allow you to change how the Map displays. Click on the 'Options' button to bring up your choices:
Confirm your choice by pressing the 'Save' button.
Note that you can revert to the original and default settings if you need to.
The Icon Palette tab allows you to control the colours used by the map filters.
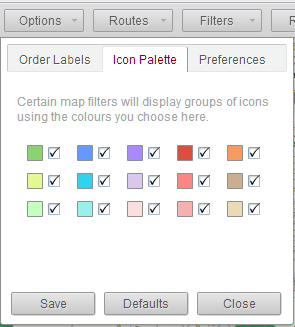
By default the map can display order icons in 15 different colours and all options will be ticked.
Each of the 15 colours can be edited by clicking on the coloured square itself which brings up the colour picker chart.
![]()
The static crosshair denotes the colour currently in use. To change this left click the mouse pointer on a different colour and the static crosshair will move to denote the update in colour. Use the Shading bar on the right hand side to make the colour darker or lighter as required. Click 'OK' to confirm the change.
Use the 'Save' button to confirm your choices.
The Preferences tab allows you to define various default views and actions.
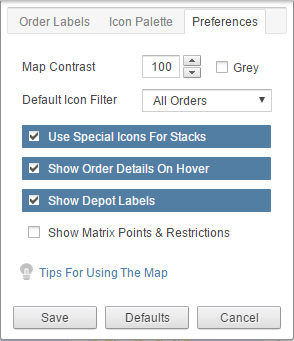
This allows you to change the strength of the map in relation to the order icons via the up and down arrows. The lower the number the more transparent the map will be compared to your orders.
This option will remove the colours from the map. This can be useful when you need better contrast between the icons and the map.
The map opens in ‘All Orders’ mode meaning that orders are listed as yellow and red circles. To set the default view to another filter click on the drop down menu and choose from the available options. These options are the same as those available from the Filters drop down button.
This option allows you to specify that you want the map to show you no difference between single and multiple drops at the same site.
If you do not want to see the basic order details whilst hovered over an icon then you can switch off this option.
This option sets the display to either show you the labels against each depot or to turn them off.
This option allows you to switch on the display of matrix points that have been created for this map.
The matrix point are the red crosses dotted over the map. These are used to calculate both time and distance between points. See Speed Table for more in depth information.
This link gives you access to the 'Map Tips'. If you would like to see the 'Map tips' then select the link.
The 'Orders' button gives you control over how you would like the software to display the orders on the map.
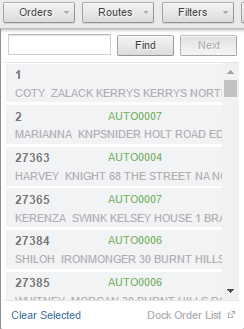
This list allows you to select orders and they will display on the map, showing you where they are by displaying a popup dialog box.
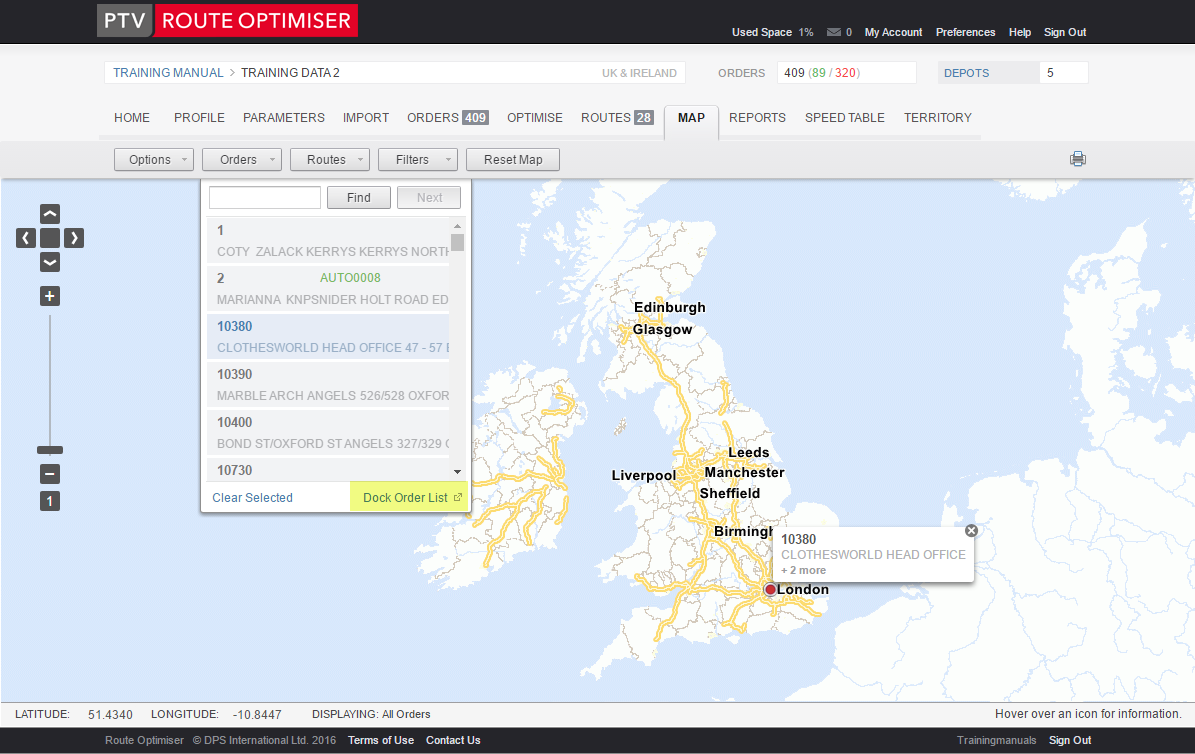
One of its features is, however, the ability to 'dock'to the side of the map by selecting the 'Dock Order List' option. (If the option seems to be dimmed you may be running the Map in Compact mode. Change the setting in your My Account - Preferences - Map).
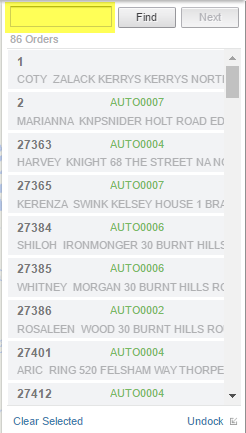
Whether the Orders are docked or within their button drop down you can search for individual orders using the search box (highlighted below). This is a 'fuzzy' search and will bring up a list of all the orders that have the search string anywhere in the searchable fields.
Once you have created one or more routes the 'Routes' button will become active. This option allows you to choose whether you display single routes or multiple routes on the map.
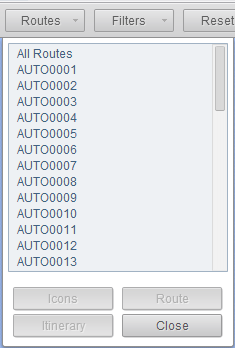
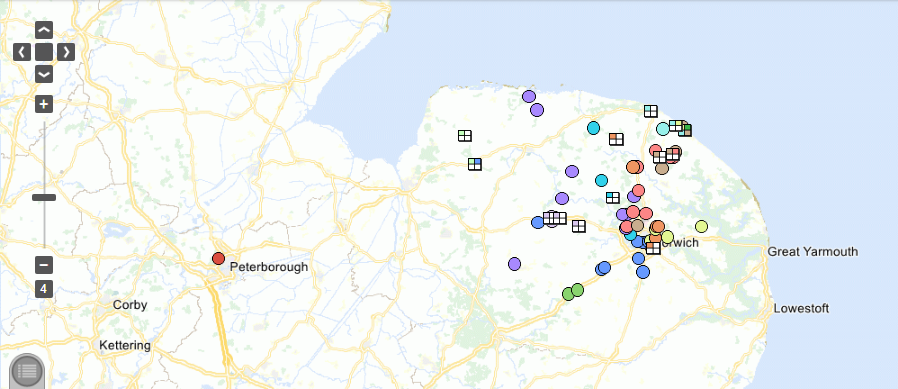
If you choose to display all of your routes the only display option you will have is 'Icons' where each colour and shape represents a different Route.
 |
you will see |
 |
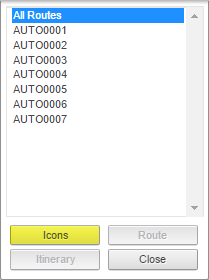
It is also possible to display the orders for selected routes. To do this hold down the ‘Ctrl’ key and highlight the routes you wish to view with a single click.
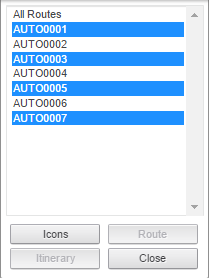
Click on 'Icons' and the selected routes will be displayed.
Choose any single route and you will be able to select from the Icons, Route or Itinerary buttons on the drop down.
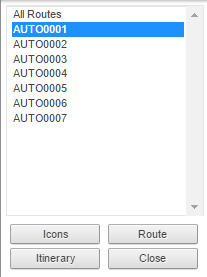
The 'Route' button will display:
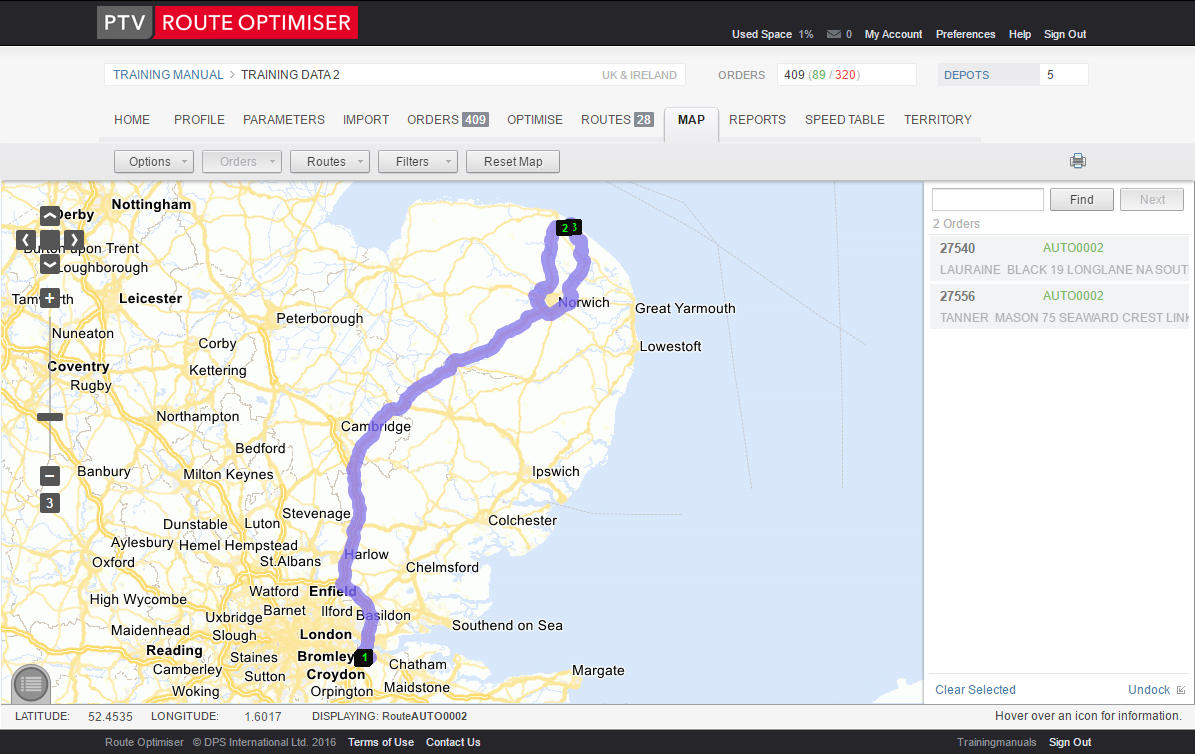
Notice the 'Snail Trail' and the numbered icons indicating the order of delivery or collection.
Select the Itinerary options and the display opens in a separate window:
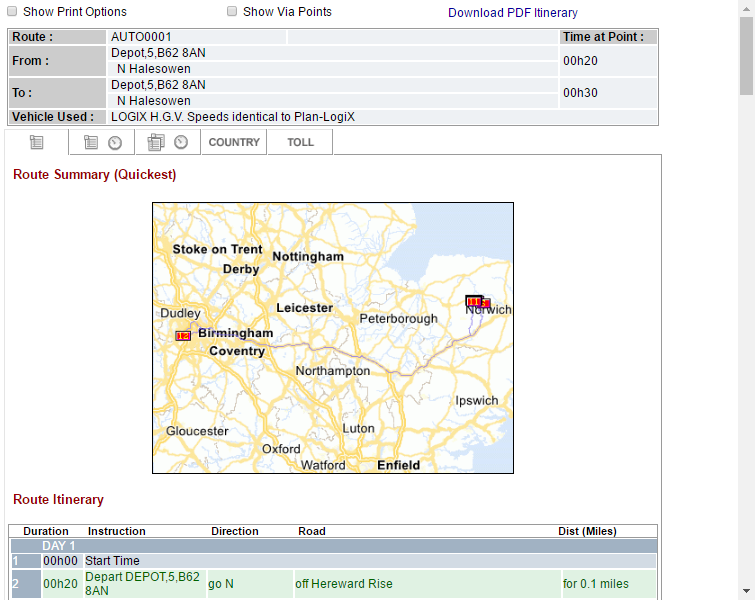
There is plenty of information on this page.
The Itinerary can also be generated from the Route List when a single route is highlighted and from the Route Viewer window when viewing the contents of a single route.
This enables you to display different types of information on the map.
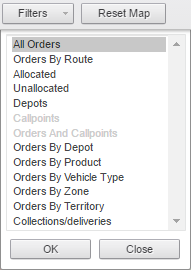
Choose your option to filter the view on the map. These are your options:
When the Orders by Depot, Orders by Product, Orders by Zone or Orders by Prefdep options are selected you will be shown a list from which you can choose one or more items. To close the Filter options box click on Close or the Filters button.
This returns the map to the original default view you see when you first open the map.
This allows you to print a picture of the map in the current view.